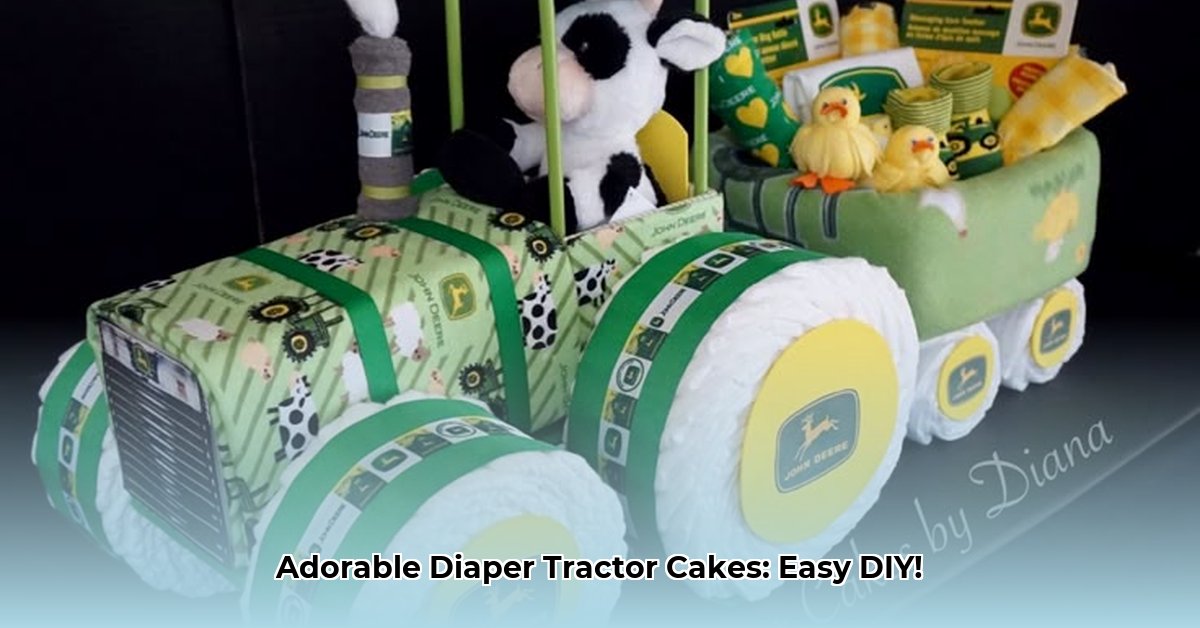
Diaper Tractor Cake: A Totally Adorable and Easy Baby Shower Gift
Thinking of making a truly unique and useful baby shower gift? Forget the usual – let's build a diaper tractor cake! This surprisingly simple project is way more fun and memorable than a store-bought card. This easy guide will show you how, step-by-step, from choosing supplies to adding charming finishing touches. Even complete beginners can create something amazing! For more detailed instructions and visual aids, check out this helpful tractor cake mold guide.
Did you know that a homemade diaper cake is considered one of the top 10 most appreciated gifts among new parents? Let's get started!
Gathering Your Supplies: Everything You Need
Before you begin your diaper tractor construction project, gather these essential supplies. Think of it like baking a cake—only instead of flour and sugar, we're using diapers! And the best part? You can probably find everything at your local dollar store.
| Item | Quantity (Adjust as needed) | Notes |
|---|---|---|
| Diapers | 30-50+ | More diapers mean a bigger, more impressive tractor! |
| Cardboard | 2-3 pieces | Sturdy cardboard is key—you want your tractor to hold its shape. |
| Ribbon | Various colors and widths | Get creative with colors and patterns! Think about the nursery theme. |
| Craft Glue | 1 bottle | A strong glue is essential to keep everything firmly in place. |
| Plush Toy (Optional) | 1 | A cute little animal or toy makes a perfect tractor driver! |
| Embellishments | As desired | Stickers, buttons, felt shapes—let your imagination run wild! |
| Rubber Bands | Several | These will keep the diaper rolls neat and tidy. |
Building the Tractor Body: The Diaper Foundation
Let's get crafting! We'll start with the tractor body, the heart of our creation. Roll your diapers tightly into cylinders, securing each roll with a rubber band. Arrange these diaper rolls in a rectangular shape, just like a real tractor's chassis. This is easier than you think.
What's the secret to successfully rolling diapers? Use a firm, consistent pressure to create even rolls.
Crafting the Wheels: Simple, Yet Effective
Next, we'll create the wheels. Cut two circles from your cardboard—make them large enough to be proportional to your tractor body. Wrap ribbon around these cardboard circles, securing each layer with glue to create sturdy, decorative wheels. Once the glue is dry, attach the wheels to the base of your tractor using more glue. See? Super simple!
Pro Tip: Use double-sided tape in addition to glue for extra-secure wheels!
Adding the Finishing Touches: Personalization is Key
Now for the fun part—personalization! If you're using a plush toy, glue it securely into the driver's seat. Get creative with your choice of stickers, ribbons, and other decorations! Experiment with different colors and designs; make your tractor unique. This is a thoughtful, personalized gift the parents-to-be will cherish.
Finishing and Presentation: The Grand Reveal
Once you're satisfied with your creation, place your finished diaper tractor cake on a nice plate or tray. Tie a pretty ribbon around it—this final touch adds elegance and completes the presentation. This is far more than just useful and adorable — it shows your personal creativity and love!
Did you know that personalized gifts are often remembered more fondly than store-bought items? Your amazing diaper tractor cake is sure to be a cherished keepsake.
How to Make a Unique Tractor Diaper Cake
Key Takeaways:
- This project is surprisingly simple and perfect for beginners. Even first-timers see great results.
- You can effortlessly customize your tractor to perfectly match the baby's nursery theme.
- The finished product is both a practical and a truly memorable baby shower gift.
- It’s a fun, creative way to celebrate the upcoming arrival of a new baby.
Here's a quick, numbered guide to streamline your creativity:
- Shape the Base: Cut your cardboard into a rectangle—this is your tractor's base.
- Create the Body: Roll up diapers and secure them with rubber bands to form the tractor's main body.
- Secure the Body: Attach the diaper rolls to the base using more rubber bands, ensuring it's firmly attached.
- Make the Wheels: Create smaller diaper rolls for the wheels.
- Attach the Wheels: Position the wheels on either side of the main body. Secure them using rubber bands and optional hot glue.
- Decorate! Use ribbons, toys, and other embellishments to personalize your creation.
This isn’t just a present—it's a statement that you painstakingly put thought, creativity, and love into the gift. Get crafting, and have fun!